Showing posts with label thriftiness. Show all posts

Saturday, March 30, 2013

Tutorial: Adding Cap Sleeves to a Communion Dress

It's very difficult these days to find a First Communion Dress, or really any formal occasion dress, with sleeves.  Our family preferences for modesty in church are covered sleeves and knees for the girls.  So for both girls' First Holy Communion, we've bought a fairly inexpensive dress at Burlington Coat Factory, and then made plans to add sleeves.  We could have found a bolero or sweater, but I hate to cover up the beautiful dresses!

I attempted this feat with Mary Clare's dress 2 years ago, but I wasn't so successful (there's a small photo of my attempt on this post).  Here are two different posts with photos of how it turned out after we brought it to a seamstress to add the sleeves.

This year we were on a bit of a time crunch, and in a different city from the previous seamstress, so I was determined to figure out how to do it myself.  I did a lot of Google and Pinterest searching as to how to add sleeves, and here's what I came up with!  Please note that I am NOT a seamstress, nor do I know any technical sewing terms.  I don't measure and can't sew a straight line.  But I did it!

Here's the dress to start with.
Lovely lace and beading.

Here was the pattern for the sleeve I made out of striped fabric.
NOTE: This fabric is folded in half on the horizontal line.

I checked the size by pinning it on the dress.  The curved part goes along the dress and the straight side of the sleeve (the part folded in half, so it doesn't need a seam!) is the outer part.

Then I used the pattern to cut my fabric.  I guess it'd be considered a chiffon fabric.
It was about $8/yard and I only got 1/4 yard 
(it was barely wide enough once I folded it, though!), 
plus I had a coupon for 20% off my entire JoAnn's purchase.
I always check the retail coupon list on Surviving the Stores when I'm shopping!
So including the thread and ribbon, this project cost about $3! 
 I think the seamstress was $20-30 last time.

Here's the sleeve, and I cut out two of them.
Remember that it's folded in half on the horizontal line there, so it's a double layer of fabric.

Then I did a running stitch along the curved part of the sleeve 
(I think that's what it's called, you just sew up and down).

Here are both sleeves after sewing the running stitch
and pulling the fabric in to gather it.
I tried to match the two sleeves as much as I could.

I used my sewing machine to sew the sleeves onto a ribbon
I noticed the seamstress did this last time.

Here are the two sleeves sewed onto the ribbon.  I figured the scratchy edges 
wouldn't bother her as much under the ribbon.

Next, I pinned the sleeves on to try to make them look alike.
I ended up taking out the right one and ripping the seam off the ribbon
so I could gather it again and copy the way the other was gathered.
My 2nd try made it look more similar to the left sleeve.
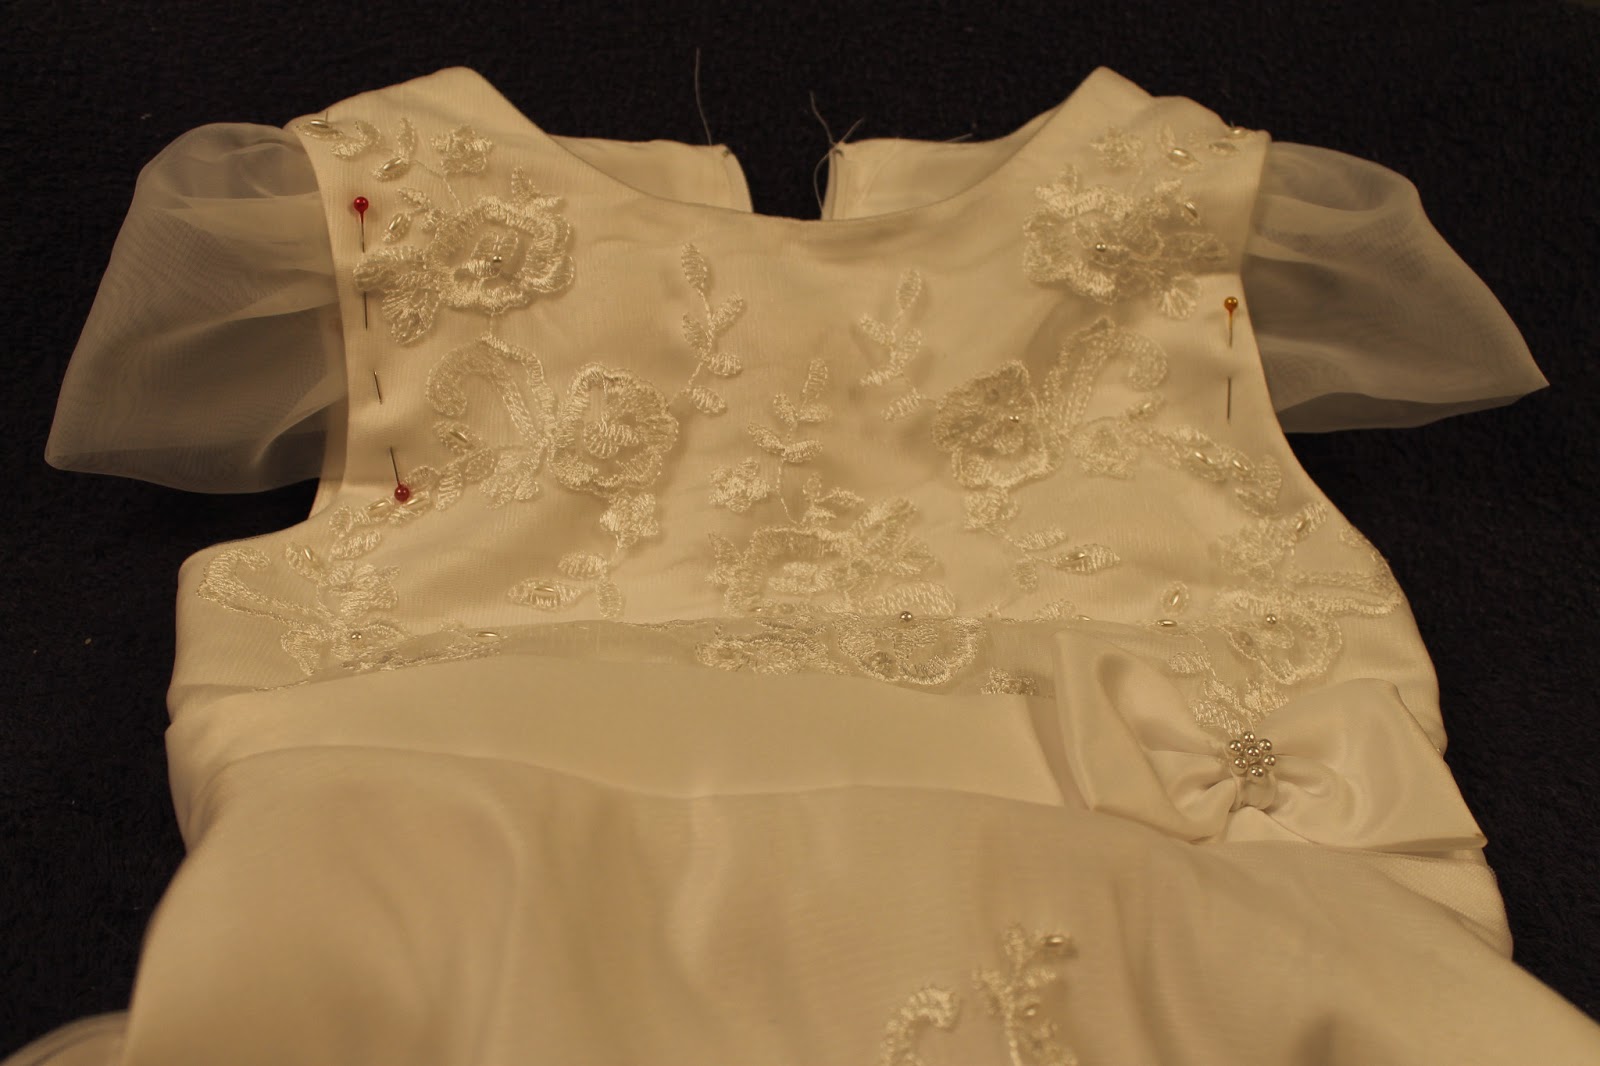
I had Ellie try it on with the sleeves still pinned to make sure 
that it looked okay and that she could move her arms.

Finally, I turned the top of the dress inside-out
 and sewed the ribbon on by hand, just going through one layer of the dress.

Here you can see how far in the back part of the sleeve is on the dress.
I felt like the cap was too high and poofy otherwise.
Maybe making the sleeve pattern differently would help with this.

And here's what it looks like!

It's not perfect, but I think it will work.
As my seamstress sister-in-law said,
"For kids, don't worry about it unless you can 
tell while they're riding horseback!"

I'll add a photo of her in the dress once I have one!
I hope this little tutorial can help someone else!

Monday, March 19, 2012

Kitchen Table Craigslist Find

I've been looking for a "new" kitchen table for a long time.  We bought this one from a garage sale before we were married and found the chairs at various thrift stores.  We only have 4 left, and they've been repainted several times so they're grimy and hard to clean.

We were toying with the options of a 6 vs. 8 person table, and also the possibilities of spending a few hundred to get something we liked vs. $100-200 for something acceptable (and generally swiped up quickly off Craigslist).

Well, I somehow found a $45 table and chairs!  It was grimy underneath and smelled a bit like cat.  One has a missing spindle and some cat scratches at the bottom.  But for $45 there was nothing to lose!
Old table...having to use metal folding chairs!

"New" table!

Yay for Craigslist!

Wednesday, May 18, 2011

Mother's Day Gift


We finally found what we were looking for! A nice fridge for sale nearby. I enjoy my online classified shopping, and am so happy when we get a great deal on something for the house. I just realized that in the past 6 months we've needed a new dishwasher, washing machine, and fridge! Yikes!

Steven picked up the fridge last night and we got everything moved over. Still need a small part to get the ice and water hooked up, and then we'll really be living large! A huge fridge with ice and water on the door; we've had enough of ice trays. Hopefully the constant demands by SJ for "COLD WATER WITH ICE" will be more easily fulfilled. The kids can get a drink themselves without needing to climb on the counter for ice and cups! I also made a mini-run to IKEA on Sunday to stock up on the kid cups, bowls, and plates which we've put in a basket in a lower cabinet more accessible for the kids.

I laughed after filling the fridge; we could put almost the entire contents of our old fridge in the DOOR of this one! Now I can stock up at the grocery store. Just need some healthy children so I can actually get out to the grocery store! The boys are still pretty miserable today.


The only disappointment last night was that Steven went on another "goose chase" for a wrought iron patio table and chairs, after picking up the fridge. We had some communication problems with the seller and he arrived to find no one home! I guess we're still on the lookout for a (very cheap) patio set. It's going to be terribly hot very soon in Texas, so it would likely be several months before we'd use it anyway. More time to scour the online classifieds!

Better get the girls back to their "real school" lessons. They've been coordinating a preschool for Steven this morning, with workbooks, crafts, and all. My cute little teachers!

And a quick prayer update: Little Arden seems to be doing better. Hopefully they have gotten the right medicines/doses to keep her heart at a normal rate. Please continue to keep her in prayer!

Thursday, January 27, 2011

Colorful T-Shirt Scrap Wreath Tutorial


It was time to put away the Christmas wreath, and I was ready for something colorful to get through the rest of this dreary winter weather. This wreath is made with scrap knit fabric and would be fun to do in pink/white/red for Valentine's Day, or other seasonal colors. It would look great on the wall or door of a child's room or playroom, or even as a hospital door wreath for the arrival of a new baby!

Here's what I did:

The only wreath form I had was a twig wreath, so I wrapped it in packing paper and secured with clear packing tape. This makes it easier to glue the fabric on. I've heard that it's even helpful to do this with a styrofoam wreath form when you're using hot glue.


These were some t-shirts, knit leggings, and a knit dress that were stained or had holes.


At first I wanted to make rosebud flowers. I cut strips of fabric and wrapped into a rose. But after gluing a couple, I realized this was going to take way too long and I wasn't going to have enough fabric. Instead, I'd just scrunch up the fabric circles for a flowery look without the need for so much fabric.


I cut out circles, about 2-4 inch diameter.


Stacked the circles. You can tell that they're varying sizes. I was just trying to use up all the fabric so I wasn't concerned about them being equal sizes.


Then later that night we started gluing! The girls helped me squeeze up the circles to look "flowery." They had so much fun helping in their PJs!


Mary Clare demonstrates her technique...Grab in the middle,


and squish together.


At first I wasn't sure if we would run out and I'd need to add another color (possibly white), but in the end we had just enough to cover the front and sides of the wreath!


Ta-da!


I nailed a ribbon to the top of the door to hang the wreath.


A colorful-looking front door!


Total time was about 2 hours with interruptions and some gluing helpers!
Let me know if anyone tries it!

Wednesday, November 17, 2010

Easy and fun throw pillows

Whoa. This afternoon I sewed 3 pillow covers, totally re-did the straps for the car seat tent, and (hopefully) completed my long-needed project of a fabric drape under the makeshift changing table in the master bath (I used iron-on velcro, which I had to iron to the inside of the wood!). Lots accomplished!

Here are my cute new pillows!


And here's how I made them, using thrifted old throw pillows as inserts. (Again, sorry for the fuzzy iPhone photos, hopefully my camera will be back soon!)

I cut my yard of fabric in half and measured how it would fit over the throw pillow. I made it an "envelope" closure for the pillow cover, so I can take it off to wash if need be.


I ironed one seam as the outside of the envelope pillow cover.


Then I sewed that seam.


Then I forgot to take a bunch of pictures! I put the pillowcase over the pillow inside out, with the stitched seam on the inside. I drew some small dashes in black marker where I wanted the side seam to be. Then I stitched that seam.


I put the pillow back in and drew where I wanted the other seam to be, then sewed that side! Here's the pillow cover inside out after the sewing was done.


I cut some of the excess fabric and decided to make a little flower pin for the outside!

First I stitched a long piece of fabric on one side to gather and ruffle the fabric.

Then I realized that it would be hard to see the flower if it was made in the same fabric.

In comes my trusty old stained Ikea fleece blanket, which I used for my first flower pin.


I cut two circles and stitched them both to the back of the flower.


Here's how it looked. I also sewed a brown button onto the middle of each flower.


Finished products!


Here they are on my couch. The cute blue lumbar pillow was a treat I bought while browsing HomeGoods last week in preparation for my Mom Cave Makeover. It's a "real" pillow with feathers inside! The two red pillows are from Target ($10/pair although I think the real price was $13, long story). I noticed they are going on sale on Black Friday for $7/pair!


I sure can't wait to do this sewing and crafting in my new room!

Monday, November 15, 2010

Making a Car Seat Tent/Canopy


I'd seen a car seat tent at our local children's resale store as a new boutique item for about $40! When I saw some links online last week on how to make one yourself, I decided to go for it! Here's how I did it. (Sorry for the confusing directions and limited bad photos, I finally sent my Nikon to be serviced. Yay!)

Normally, you'd just use a yard and a quarter of 2 coordinating patterns of regular cotton fabric, but I decided to use some receiving blankets which we're not using much anymore! They weren't quite long enough to cover the seat, so I had to improvise and use a third one to add some length.

Here are the two blankets I used for the inside and outside of the tent. I put them together on the floor with the correct sides facing in.


I cut off a strip about 4 inches wide and the length of the third blanket.


Then I ironed the rest of the third blanket in half,


and I cut down the fold, to divide the rest of the blanket in half.


I folded the two halves of the brown blanket in half, inside-out, and sewed down the width.


Then I flipped it inside out and found 4 marbles to sew in as weights for the corners of the tent.


Here's where I sewed the marbles into the corners.


I placed the brown half-blankets inside the two full-size blankets and folded in the sides so they wouldn't be sewed down by the machine. I pinned around the blanket and sewed it closed, except for a small portion left to pull it through.


Then I took that leftover strip of brown, and cut it into two 7-inch long pieces. These could have been shorter; they were actually too long. I folded it with the right-side-in and sewed around the two edges, pulling it out the other side. Then I sewed that last seam closed.


And used iron-on velcro strips.


I sewed the strips onto the tent after holding it up to find the right spot, close to the middle. I put them a little too far apart and am going to have to fix this, because it hangs a bit too low. But I thought it turned out pretty cute!


Here's the seat in the stroller at the park this morning, where I did my workout while the little ones played and Mary Clare was in her Faith Formation class at church.


I know those directions were really confusing and could have used some more photos. To make it easier, google "car seat tent" and you can find some better directions when you are using fabric instead of too-small blankets :)

And a safety note: most car seats require the handle to be put back for safety while driving. Also, make sure to watch baby at all times when under the tent! But it's a great alternative to throwing a blanket over the car seat, which never seems to stay put, and could more easily fall on top of the baby. It's also nice for me since my canopy was broken and folding the tent back over the handle makes a nice little canopy!
Related Posts with Thumbnails
 
site design by designer blogs